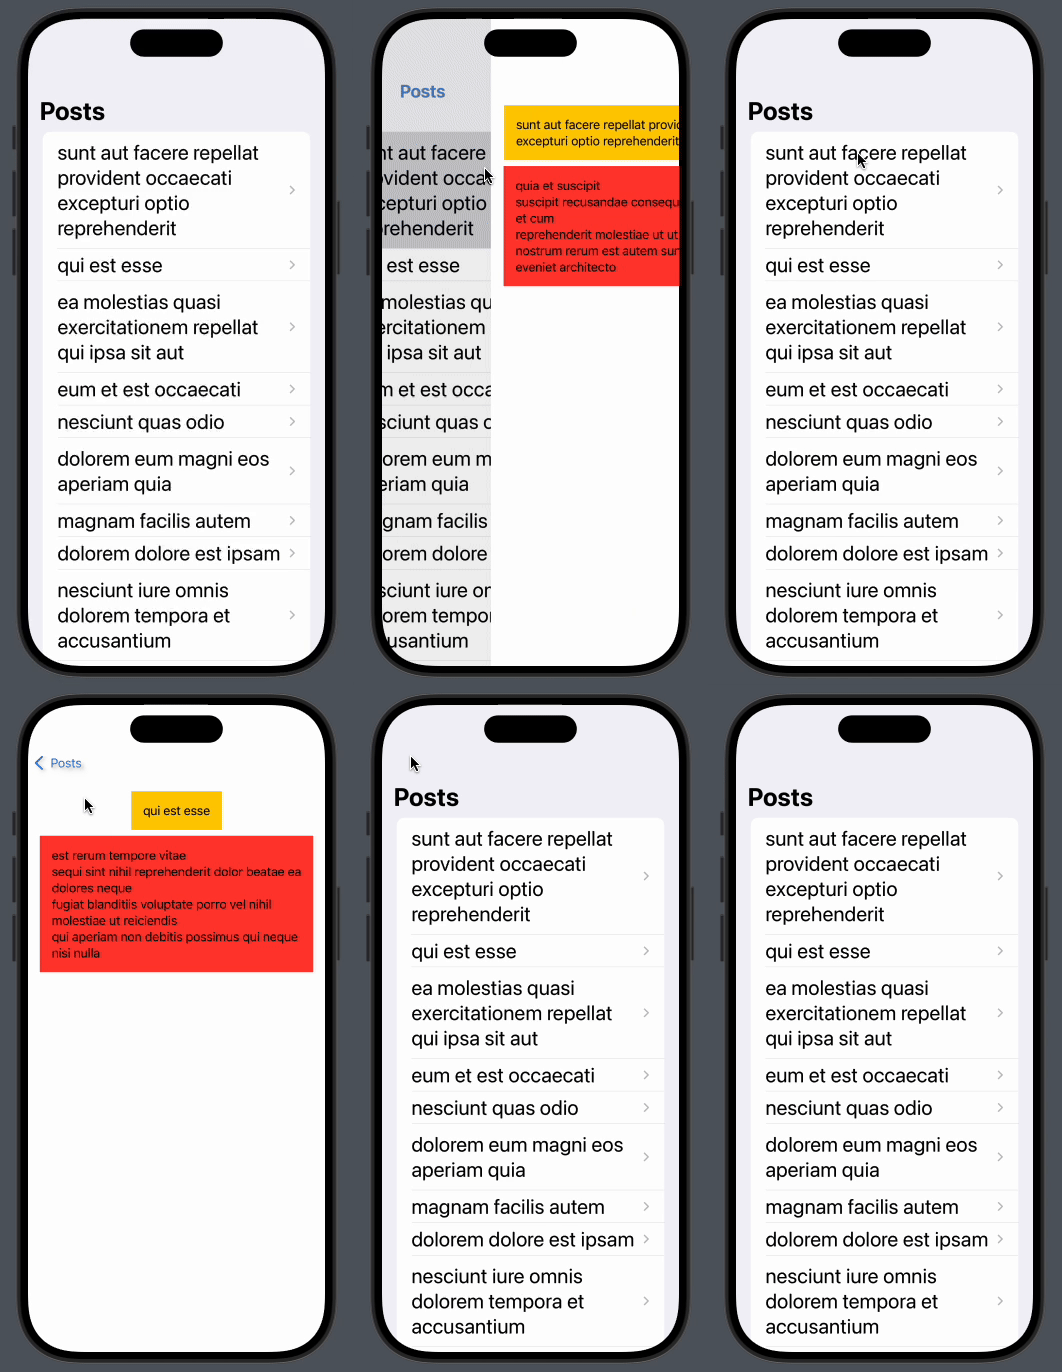
In this quick post, you will learn how easy it is to setup a navigation stack in SwiftUI to allow a smooth transition between two screens.
You will work on the same code from a previous article and modify it to add a new screen and a push animation.
Start by cloning the starter project here, open the project and select ContentView.swift to open it in the editor.
Remove the body content and replace it with the following:
NavigationStack {
  List(posts, id: \.title) { post in
      NavigationLink(destination: DetailsView(post: post)) {
          Text(post.title)
              .font(.title)
      }
  }
  .onAppear {
      let viewModel = PostsViewModel()
      self.posts = viewModel.getPosts() ?? []
  }
  .navigationTitle("Posts")
}
What has changed compared to the previous code is how we display the data, previously the data was populated inside a DisclosureGroup to make each item expandable, we just removed that and embedded each item of the List inside a NavigationLink instead which is in turn embedded in a NavigationStack that controls the navigation flow. The navigation link redirects to the next screen named DetailsView where we pass the selected post data as a dependency. Lastly, we set the title of the view using the navigationTitle modifier.
Next, create a new SwiftUI file and name it DetailsView. Change the content of the struct to the following:
    var post: Post
    var body: some View {
        VStack {
            Text(post.title)
                .padding()
                .background(Color.yellow)
            Text(post.body)
                .padding()
                .background(Color.red)
            Spacer() // Align UI elements to the top of the screen
        }
        .padding()
    }

    #Preview {
        // Sample data for preview
        let samplePost = Post(title: "Sample Post", body: "This is a sample body for the post.")
        DetailsView(post: samplePost)
    }
In the above code we started by adding the post dependency then displaying content accordingly inside two Text views. the padding modifier applied at the end is crucial to position the UI elements inside the safe area of the screen.
Run the project, you will notice the push and pop animations are implemented for you by default when you first used the SwiftUI NavigationStack and NavigationLink.

References:
https://developer.apple.com/documentation/swiftui/navigationstack
https://developer.apple.com/documentation/swiftui/navigationlink
Thanks for reading – see you in the next digest!
Discover more from SweetTutos
Subscribe to get the latest posts sent to your email.