In a previous tutorial, you learnt how to implement the Google place picker API to get a nice set of nearby places around you. The google maps SDK for iOS has more services and API to work with, and one of them is the Indoor maps API.
The indoor maps allows you to discover buildings and POI floor by floor through a level switcher. Kind of a hierarchical navigation and zoom in and out of a building.
This tutorial is made to show you how to implement the Indoor maps feature in your app.
Without further ado, let’s do this!
To begin with, I prepared a basic starter project to work on together, download it here.
I also included Google Maps SDK to the project using cocoapods, hence make sure to open the GoogleIndoor.xcworkspace file instead of the .xcodeproj file.
At the end of this tutorial, you will have an Indoor map plan for some locations in Japan. Basically, as you can see in the Main.storyboard file, the project consists of two main screens. The first screen will hold the google map with its indoor view, while the second screen will show up once you click on the search button to choose from a set of locations.
Let’s start by loading the Google maps in your app. Remember, the Google maps SDK was installed through cocoapods and is ready to go, so all you need to do now is to import the library and use it.
Select the AppDelegate.swift file from the Project navigator view, and add the following import at the top of the class:
import GoogleMaps
Next, locate the didFinishLaunchingWithOptions lifecycle method and implement the following code inside:
GMSServices.provideAPIKey("YOUR_API_KEY")
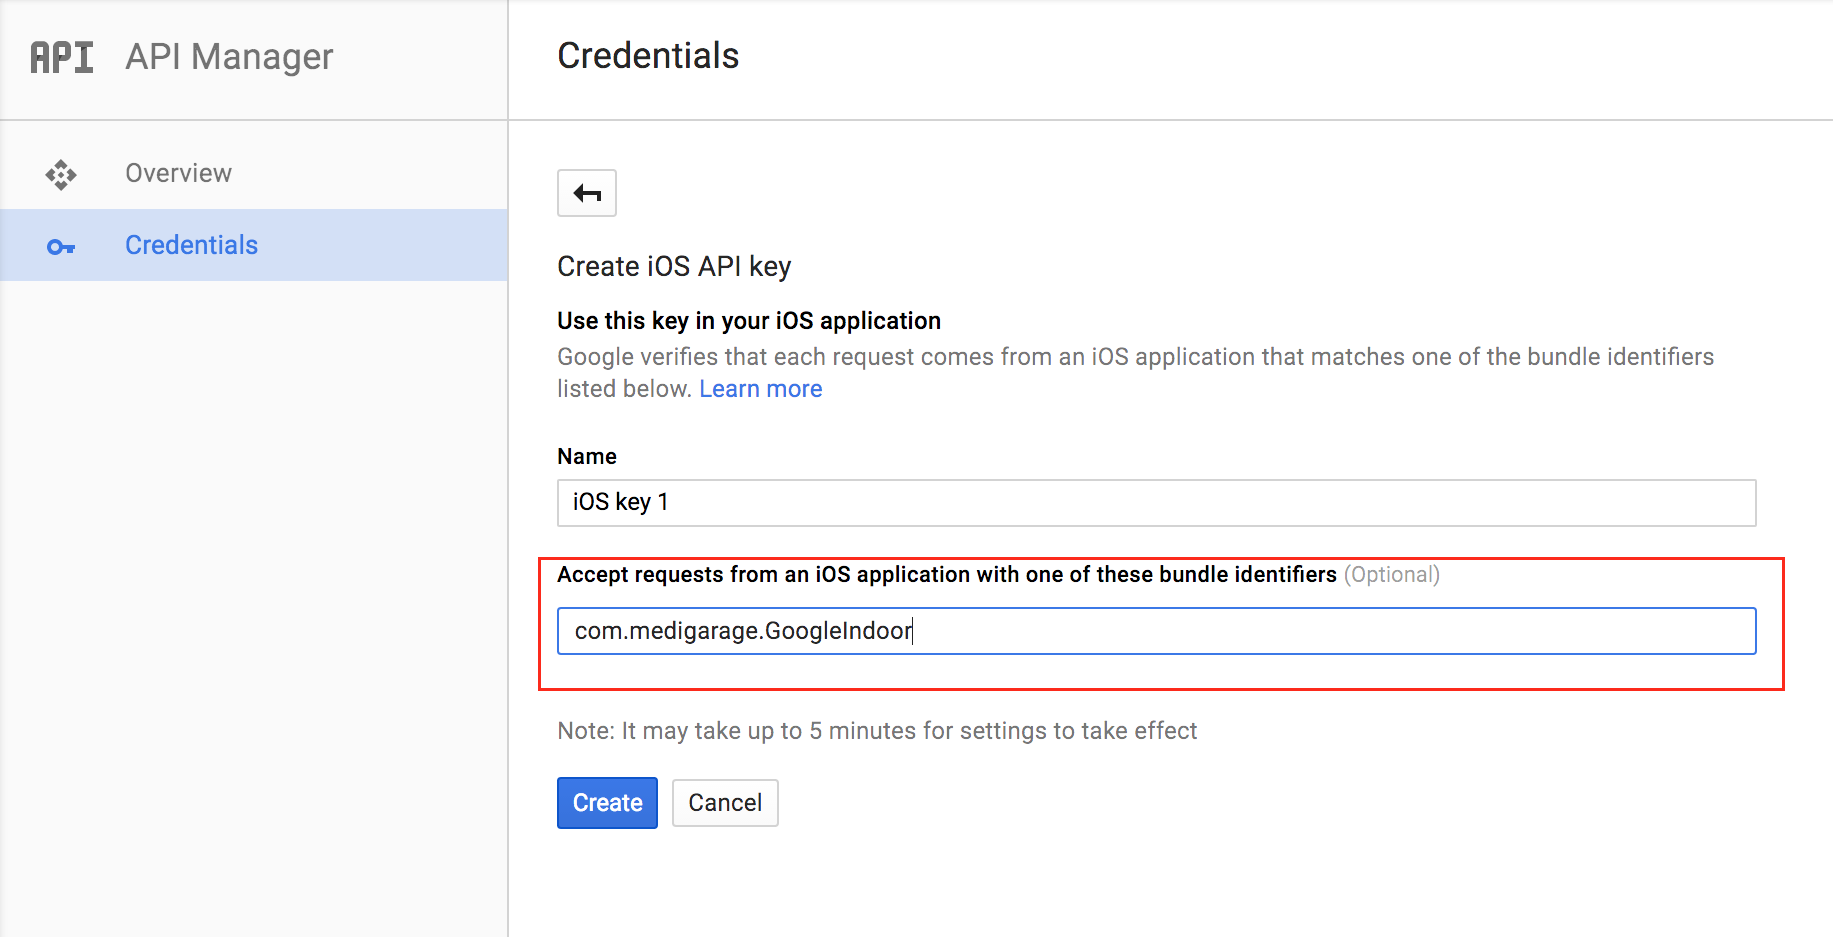
Note: Google require an API Key in order to authenticate your app while using their services. If you don’t have it already, head over here to create one for your app.
Also, make sure to include the app Bundle Identifier in the whitelist of accepted bundle identifiers to use your API Key.
Cool, now switch to the ViewController.swift file from the Project navigator view. Remember, the ViewController.swift is the class that handle the main screen of the app.
Make the following changes to the class code:
// At the top of the class
import GoogleMaps
// Right After the class name
var mapView: GMSMapView!
// Inside the viewDidLoad method, right after the super.viewDidLoad
mapView = GMSMapView(frame: CGRectZero)
self.view = mapView
The code above will show the Google map in the screen. You can run the app at this stage.
Now, let’s move to the table view screen to show some locations to choose from.
Take the following steps:
1- Select the Main.storyboard file from the Project navigator view
2- Select the List View Controller screen (the third screen in the canvas).
3- Select the table view
4- Switch to the Connections inspector.
5- Drag a line from the dataSource object to the List View Controller (as shown in the screenshot below).
6- Drag another line, but this time, from the delegate object to the List View Controller.
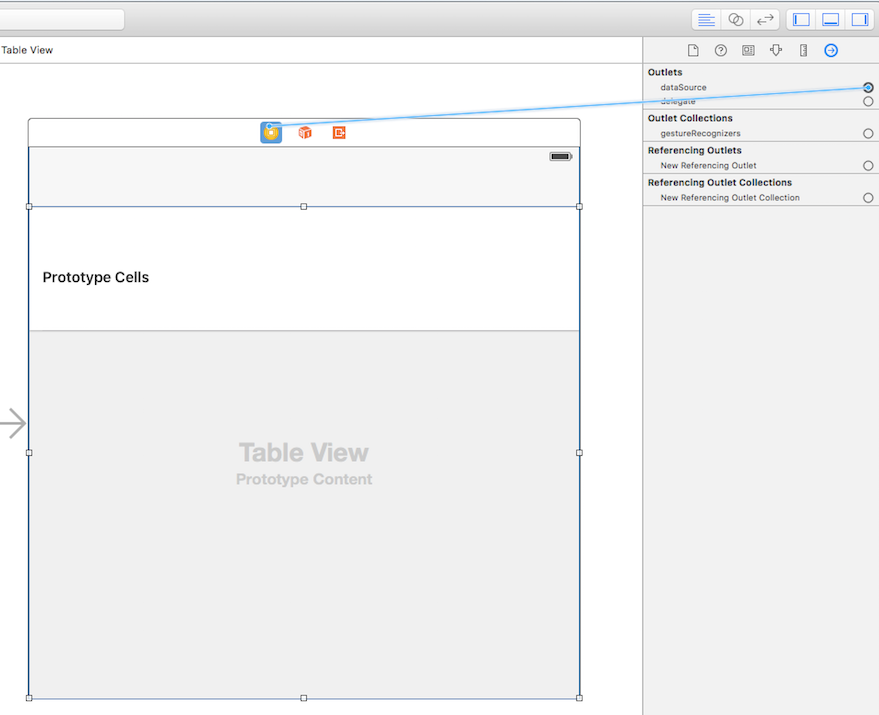
Basically, you just set the ListViewController class to behave as the datasource and the delegate of the table view.
Select the ListViewController.swift file from the Project navigator view to open it in the editor, and make the following changes to its code:
// Right below the class declaration
var listIndoorLocations: [String]!
// Inside the viewDidLoad method
self.automaticallyAdjustsScrollViewInsets = false
listIndoorLocations = ["Tokyo Big Sight", "Roppongi Hills", "Tokyo Midtown","Isetan Shinjuku"]
// Before the closing bracket of the class
func tableView(tableView: UITableView, numberOfRowsInSection section: Int) -> Int {
    return listIndoorLocations.count
}
func tableView(tableView: UITableView, cellForRowAtIndexPath indexPath: NSIndexPath) -> UITableViewCell {
    let cell: UITableViewCell! = tableView.dequeueReusableCellWithIdentifier("CellID", forIndexPath: indexPath)
    cell?.textLabel?.text = listIndoorLocations[indexPath.row]
    return cell
}
Nothing fancy here, the code above will populate some data in the table view through the required cellForRowAtIndexPath and the numberOfRowsInSection datasource methods.
Note: The automaticallyAdjustsScrollViewInsets property is set to false in order to disable the default adjustment of the table view insets by the view controller.
Run the app and click on the search button to move to the next screen. Make sure the data is shown correctly inside the table view.
Now that the user can make his selection, we need a way to tell the map screen about which location to show its relevant Indoor map. This can be done by sending this information back to the map screen, and the best way to do so is through a protocol-delegate pattern.
Always inside the ListViewController class, start by declaring the protocol you gonna use to communicate informations to the precedent controller. Place the following code BEFORE the class name:
protocol IndoorProtocol{
    func showIndoorForRegionWithIndex(index: Int)
}
For the sake of this tutorial, this protocol will have one method to implement, but you are free to add as much protocol methods as you want.
Next, declare an instance of the protocol by placing the following statement right after the class name:
var delegate: IndoorProtocol!
Last but not least, implement the following table view delegate protocol method:
func tableView(tableView: UITableView, didSelectRowAtIndexPath indexPath: NSIndexPath) {
     delegate.showIndoorForRegionWithIndex(indexPath.row)
     self.navigationController?.popViewControllerAnimated(true)
}
The didSelectRowAtIndexPath protocol method above will call the showIndoorForRegionWithIndex method from the IndoorProtocol, then it will pop the current screen to show back the map controller.
Ok, so the showIndoorForRegionWithIndex protocol method is called, but not yet implemented in the delegate controller. Remember the delegate is the controller that will implement the IndoorProtocol methods, and in this case, it’s the ViewController.swift file.
Select the ViewController.swift from the Project navigator and implement the following code:
func showIndoorForRegionWithIndex(index: Int) {
     let lat = coordinates[index][0] as! Double
     let lon = coordinates[index][1] as! Double
     let camera = GMSCameraPosition.cameraWithLatitude(lat,
                                                          longitude:lon, zoom:18)
     mapView = GMSMapView.mapWithFrame(CGRectZero, camera:camera)
     self.view = mapView
}
The code above will fetch the relevant coordinates (longitude and latitude) based on the index parameter which is passed on the call from the ListViewController. It will then change the map frame to point to the new selected coordinates and render the Indoor map levels for it.
Let’s declare and initialise the coordinates array. Make the following changes to the ViewController.swift file:
// Right after the class name
var coordinates: [AnyObject]!
// Inside the viewDidLoad method
coordinates = [[35.630090, 139.793200], [35.660490,139.729600], [35.665742,139.731354], [35.687719,139.702146]]
Before you run the app, you need to make the current class conform to the IndoorProtocol protocol. Also, this class needs to be set as the delegate of the ListViewController class.
To do so, make the following changes to the class:
// Change the class declaration to the following
class ViewController: UIViewController, IndoorProtocol {
// Implement the following method before the closing bracket of the class
override func prepareForSegue(segue: UIStoryboardSegue, sender: AnyObject?) {
    let listVC = segue.destinationViewController as! ListViewController
    listVC.delegate = self
}
The best moment to set the current class as the delegate for the ListViewController is when the storyboard segue is about to move, because that will enable you to take advantage of the ready to go destinationViewController instance.
That’s it, run the project and enjoy the Indoor map levels in your app 🙂
As usual, you can download the final project source code here.
Feel free to leave a comment below, I’d love to hear your thoughts!
Discover more from SweetTutos
Subscribe to get the latest posts sent to your email.